Link2SD Plus v4.3.4 Patched – Moving Android apps to SD card in just 8 steps (Complete Tutorial – Exclusive to Usroid)
Perhaps you are one of the users who have become frustrated with the lack of internal memory on your smartphone or Android tablet, and for this reason, you are unable to install many applications and games on your mobile device. There are various software programs available for transferring application and game data, one of which we introduced some time ago by the name of FolderMount, but today we intend to introduce the best and most powerful application for transferring applications and games to the memory card, which allows you to easily transfer applications to the memory card, unlike similar applications that only transfer their data. Yes, the Link2SD Plus application allows you to transfer desired applications to your memory card with just one touch and apply settings so that installed applications are automatically installed on the external memory card without user intervention!
If you want to install your programs and games on your memory card and never worry about running out of phone memory, we recommend that you don’t miss the useful Link2SD app and say goodbye to the problem of memory shortage forever by installing it on your mobile!
Some features and capabilities of the Link2SD Plus Android application:
* Having a powerful program management for precise control over applications
* The possibility of selecting a memory card or SD card for installing applications and games by default
* Having the ability to delete system applications on your phone with just one touch and without going through hard and lengthy steps.
* Display complete information about the amount of internal, memory and peripheral memory used and empty.
(Note: The text appears to be in Persian/Farsi, and may have some errors or inconsistencies. This translation is a best effort, and may not be perfect.)
* Having a dedicated widget for clearing app cache via the display screen with just one touch
* Providing a wide range of options for sorting and filtering useful applications
* The possibility of transferring individually or in groups installed applications to memory with just one touch
(Note: No errors were found in the original text, but the translation has been provided for clarity.)
* Support for +35 living languages in the world including English, Spanish, Chinese, French, Italian, etc.
Today at Usroid, we have decided to introduce the Link2SD Plus application and provide you with a complete tutorial on how to apply custom settings. To view the tutorial and learn tips on using the program, stay with Usroid and us 🙂
Please note: The tutorial provided by Usroid is not just a translation. This method has been personally tested by me and the tutorial has been explained in a simple way. We kindly request that Iranian websites copying from Usroid mention the source if they use the tutorial.
Plus and unlocked version of the application (ad-free and without additional services)
* Resolving issues and improving program performance

To use the Link2SD Plus application, keep in mind that:
1 – Your smartphone or tablet running Android must be rooted.
2 – Before starting work, take a backup of your memory so that in case of any problem, your information will not be lost.
How to use Link2SD Plus:
1- Connect your smartphone or tablet to the computer in Mass Storage mode.
2 – Download MiniTool Partition Wizard Professional software from the following link and install it on your computer. (Download MiniTool Partition Wizard Professional software with a size of 14 MB)
3 – Run MiniTool software; this program displays all disks connected to the computer in its environment. Right-click on your disk or memory card and select Move/Resize. Now, on the new page called Move/Resize Partition, decrease the Partition size. (Reduce the Partition size to about 500 to 550 megabytes to get the unallocated space after) Finally, click OK.
4 – Your memory card is now divided into two parts; the first part is the same as the first partition and the second part is identified as unallocated, where the second partition is supposed to be created. Note that the changes you made in the previous step (resizing the initial partition) have not been applied yet, and you must click on the Apply option to apply the changes. By clicking on the Apply option, the software will make the desired changes to the memory card. So wait for the software to finish its job and see the message “Operation completed successfully”.
5- If the changes have been applied correctly, you should see the memory card in two parts: one part with the fat or fat32 format which is the primary partition, and the other part which is identified as unallocated and is intended to partition it at this stage. . Now, right-click on the unallocated section and select the Create option; When you clicked on the option in the previous step, a page opens in which you select primary mode from the Creates As section and select FAT32 mode from the File System section; be careful not to mess with other settings; Finally, click OK.
6 – Now you will see that the memory has been divided into two partitions, both of which must be primary. Please note that to apply the changes, you must click on the Apply option at the top. Depending on the size of the memory and the speed of your computer, the program will take some time to apply the changes, so you must wait until the process is complete.
7 – The memory card partitioning task was successfully completed and now you can close the minitool software. Turn your phone on and off once (note that it may take some time for the phone to turn on, do not worry and just be patient).
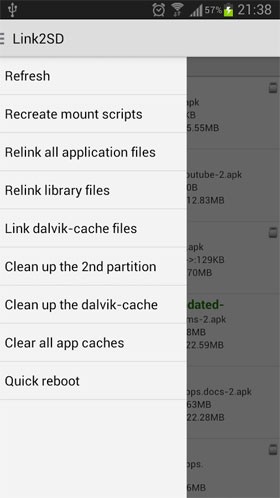
8 – When your phone turns on, download and install the Link2SD Plus application from the bottom of the download page. Run the software, and a message will appear asking you to restart your phone. Confirm the message to restart your phone. After your phone turns on, run the program to view a list of all games and applications. To transfer them to the memory card, click on the desired application and click the Create Link button. In the opened page, check all three options: Link application file, Link delvikcache file, and Link library files, and click the OK button. This will transfer the desired application to the memory card!
– To transfer programs and games directly to memory after installation, run link2sd, press the menu button, select settings, and check the Auto link box!
– The possibility of restoring programs from memory to the memory card has also been provided under the linked software in the program list, written in red as Linked sd card. If desired, you can return the software and games to your phone’s internal memory by the Remove link option. Software.


Post a comment